Next: Annotation Editing Up: A quick look at WAVE Previous: Starting WAVE
At the top of the window is the title bar, which reads `Record 100s
atr'. Below the title bar is WAVE 's main control panel, which
contains three groups of buttons. Several of these (
![]() ,
,
![]() , and
, and
![]() ) are menu buttons
(distinguished by the `
) are menu buttons
(distinguished by the `![]() ' at the right end of the button), and are
selectable using the right mouse button. The other buttons are selected using
the left mouse button.
' at the right end of the button), and are
selectable using the right mouse button. The other buttons are selected using
the left mouse button.
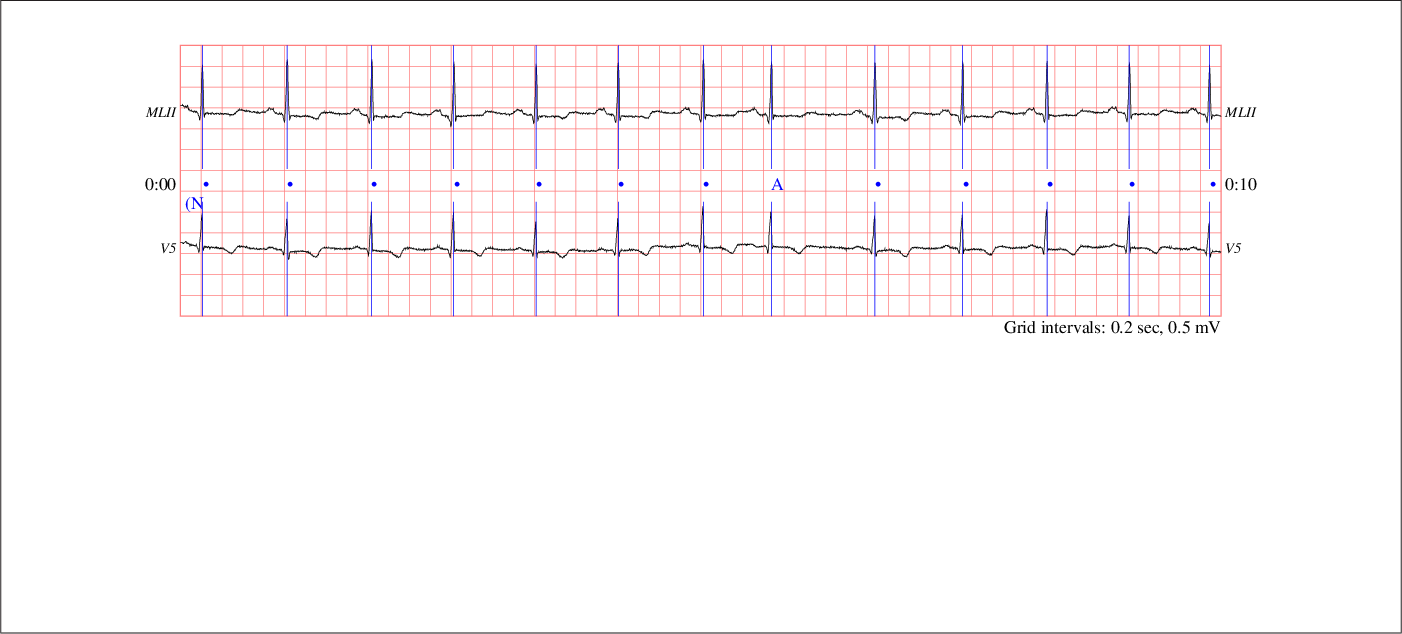
Below the main control panel is the signal window. This window shows a portion of the sample record 100s, which contains two signals. Between the two signals, annotations are shown. The first annotation (`(N', at the left edge of the window) is shown below the level of the others, to indicate that it is a rhythm label (`(N' means normal sinus rhythm). Most of the other annotations are `N', and indicate normal beats; the `A' indicates an atrial premature beat. In the lower corners of the signal window, the time indicators (`0:00' and `0:10') show the elapsed time in minutes and seconds from the beginning of the record to the samples at the left and right edges of the window respectively. (If your display is less than about 260 mm wide, the signal window will not show a full 10 seconds of the record.) When you move the pointer into the signal window, it changes shape. Annotation editing and other operations are possible while the pointer is in the signal window; these operations are described in later exercises.
The buttons in the middle group (
![]() ,
,
![]() ,
,
![]() ,
,
![]() ,
,
![]() ,
,
![]() , and
, and
![]() ) are the controls that you use to navigate through the
record. The
) are the controls that you use to navigate through the
record. The
![]() button advances the signal window display by the
width of the window (10 seconds in this case). Move the mouse pointer over
button advances the signal window display by the
width of the window (10 seconds in this case). Move the mouse pointer over
![]() and press the left button. (This common action is referred to
below as `clicking left on
and press the left button. (This common action is referred to
below as `clicking left on
![]() '.) The signal window is redrawn,
and now shows the interval from 0:10 to 0:20. The
'.) The signal window is redrawn,
and now shows the interval from 0:10 to 0:20. The
![]() button also
advances the window, but by only half the window width. Try it now.
Similarly,
button also
advances the window, but by only half the window width. Try it now.
Similarly,
![]() moves the window back by one screenful, and
moves the window back by one screenful, and
![]() moves it back by half a screenful. Use these buttons to move to
a window that begins at 0:55. Since the record is only 1 minute long, the
right half of the window is empty. Notice that you can continue to advance
past the end of the record if you wish. (WAVE will not allow you to back up
past the beginning of the record, however.)
moves it back by half a screenful. Use these buttons to move to
a window that begins at 0:55. Since the record is only 1 minute long, the
right half of the window is empty. Notice that you can continue to advance
past the end of the record if you wish. (WAVE will not allow you to back up
past the beginning of the record, however.)
Buttons such as
![]() , with labels that end with `...', make
WAVE open other (so-called `pop-up') windows. Click left on
, with labels that end with `...', make
WAVE open other (so-called `pop-up') windows. Click left on
![]() now. The Find window (figure 1.2)
will appear.
now. The Find window (figure 1.2)
will appear.
Within the Find window are four text fields in which you may type. Move the pointer into the the part of the window below the title bar. A black, upward-pointing triangle (the text cursor or insertion point) should appear in one of the three fields. (Once again, your window manager may influence what you see. If you see a grey diamond rather than a black triangle, you must perform whatever action your window manager requires to give the keyboard focus to the Find window. Usually, clicking left is sufficient.)
The Start time and End time fields match the times shown in the
lower corners of the signal window. If you change either of these fields, the
signal window moves accordingly. To change a text field, move the pointer to
the right of the existing text and click left, press
![]() or
or
![]() to erase any characters you wish to change, and type in the
desired value, finishing by pressing
to erase any characters you wish to change, and type in the
desired value, finishing by pressing
![]() (or
(or
![]() ).
(Always remember to press
).
(Always remember to press
![]() after changing a text field; your
changes are not registered until you press
after changing a text field; your
changes are not registered until you press
![]() .) Try changing the
Start time and End time fields now, and watch how the contents of
the signal window change. You can type any desired time into these fields;
specifically, it need not be a multiple of 5 seconds.
.) Try changing the
Start time and End time fields now, and watch how the contents of
the signal window change. You can type any desired time into these fields;
specifically, it need not be a multiple of 5 seconds.
Using any of the controls you have seen so far, set the signal window so that
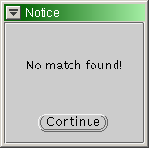
it shows the segment of the record beginning at 0:22. Now select the Search for annotation field, and enter `A' (followed, as always, by
![]() ). This action asks WAVE to find the next occurrence of an
`A' (atrial premature beat) label, and to redraw the signal window
roughly centered on that label. As you may have noticed, the only `A'
annotation in record 100s occurs at about 0:06, so WAVE is unable to
satisfy this request. Whenever WAVE cannot do what you have asked, it
displays
). This action asks WAVE to find the next occurrence of an
`A' (atrial premature beat) label, and to redraw the signal window
roughly centered on that label. As you may have noticed, the only `A'
annotation in record 100s occurs at about 0:06, so WAVE is unable to
satisfy this request. Whenever WAVE cannot do what you have asked, it
displays
The
![]() and
and
![]() buttons on
WAVE 's main control panel are used to search for annotations
that match the Search for field in the Find window. Searching
forward using
buttons on
WAVE 's main control panel are used to search for annotations
that match the Search for field in the Find window. Searching
forward using
![]() will be unsuccessful (we know
this, because WAVE has already tried to do so after we changed
the contents of the Search for field). Use
will be unsuccessful (we know
this, because WAVE has already tried to do so after we changed
the contents of the Search for field). Use
![]() button to search backwards.
button to search backwards.
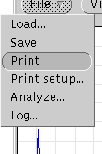
If a PostScript printer (or a PostScript interpreter such as GhostScript)
is available, try printing the contents of the
signal window. To do this, press and hold the right mouse button
while the pointer is above
![]() ; then drag the pointer
downwards until the Print selection is
highlighted, and release
the right mouse button. Most modern printers will be able to print the page
at (nearly) full speed; older PostScript printers may require several
minutes to do so. It is not necessary to wait for the output to
appear before continuing. The output will appear as in figure 1.3.
; then drag the pointer
downwards until the Print selection is
highlighted, and release
the right mouse button. Most modern printers will be able to print the page
at (nearly) full speed; older PostScript printers may require several
minutes to do so. It is not necessary to wait for the output to
appear before continuing. The output will appear as in figure 1.3.
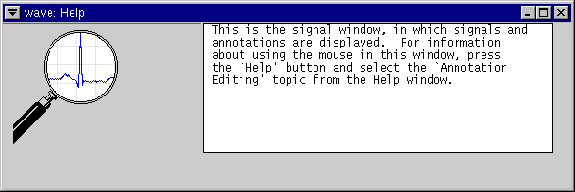
WAVE has three types of on-line help. The first type, called spot
help, works properly only if you are using an Open Look window manager (olwm or olvwm), although a local expert may be able to show you how to
use it with another window manager. To use spot help with an Open Look window
manager, move the pointer to any control or display area in a WAVE window
and press the
![]() key (or the
key (or the
![]() key if your keyboard does
not have a
key if your keyboard does
not have a
![]() key). A spot help window (see
figure 1.2) appears; it contains a magnifying glass icon
showing the area you have selected, and a description of the control or
display.
key). A spot help window (see
figure 1.2) appears; it contains a magnifying glass icon
showing the area you have selected, and a description of the control or
display.
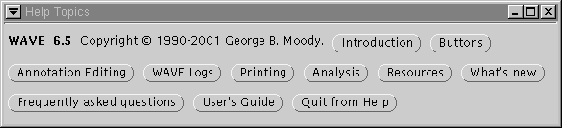
To get an overview of how to use WAVE , or if you cannot use spot help,
click left on
![]() in WAVE 's main control panel.
in WAVE 's main control panel.
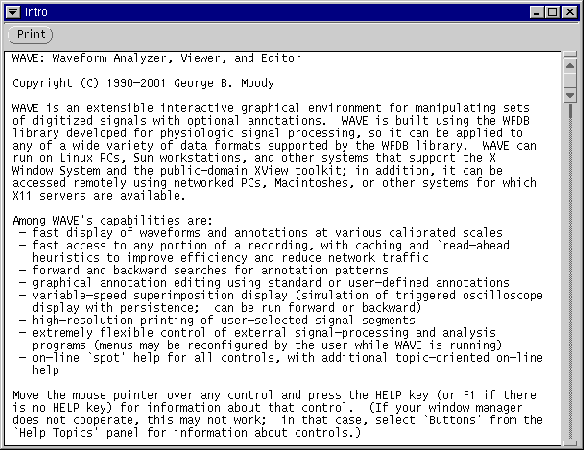
The third (and most comprehensive) form of on-line help can be used if
a suitable web browser is available on the WAVE host system.
(WAVE uses Mozilla by default.) Set the environment variable URLV
to the name of your browser if you prefer a different browser. See
WAVE and the Web
for details on configuring WAVE and your browser to work together.
Click left on the
![]() button in the Help
Topics window to open this manual using your web browser. If your
browser is not running already, this may take a few moments while
WAVE starts it up.
button in the Help
Topics window to open this manual using your web browser. If your
browser is not running already, this may take a few moments while
WAVE starts it up.

George B. Moody (george@mit.edu)